Monday, October 10, 2016

kid super hero capes

Aunt Dottie was always making something for the kids in our family. Growing up, I often got gifts of Barbie doll clothes that she made by hand.

While I'm waiting for my upholstery materials to come in, I began work on my list of Christmas presents. Some time ago, I had the idea to make super hero capes and masks for some little ones in the family. I decided to challenge myself and only use materials I already own.


Isn't it adorable? The little girl cape is for a little one not yet born - due in January who has 2 older brothers who are both not quite school age.


Hopefully, they will have many hours playing super hero pretend together.


I turned on the trusty Brother embroidery machine and made appliques of their first initial. I used tear away stabilizer. I even tried out my new supply of water soluble stabilizer. They result was the same, so no real difference between the products.


It worked nicely. I then took some Heat and Bond and ironed it to the back


I took some fabric, ironed on Heat and Bond to the back and attached it to my mat. The Heat and Bond helped stabilize the fabric so it cut a little nicer. Using my Brother Scan N Cut, I found some shapes that were preloaded in the machine and cut 2 sizes of the same pattern. 


I found a free pattern using Pinterest and I printed it out, taped it together, and cut out the cape fabric. Check out Create Kids Couture and her free pattern.


Then I positioned the shapes and applique and ironed them down.


I went ahead and stitched them down because let's face it .... kids play hard.


I added some Velcro for the necks. I sewed in several pieces so they can be adjusted as they grow.


So for the little girl, I took a pattern for a bib I had and modified it to make a cute little cape. I used the neck from the bib, and the bottom curves of the super hero cape and it came out great.


I cut out 2 pieces of the pattern and sew'd them right sides together. I left an opening at the bottom and turn them right side out.


I ironed them down and then stitched around the outside, which closed the opening I used for turning.


I bought some pre-made masks months ago at Joann Fabrics. They are just felt masks. Pretty plain. I cut my design out on paper to fancy up the masks.


I used left over iron on fabric from the symbols, so the Heat and Bond was already on and ironed it onto a nice stiff craft stabilizer. Then I cut out the shapes and sewed them on the masks.


When I turned the masks over, I saw the glaring white stabilizer so I took some fabric paint and gave it a quick once over.


And ... of course, I got a little paint on the front of the blue mask - but I painted the tips of the ears. Sometimes you just gotta improvise.


I think they are super cute. The boys will soon have a little sister and together they can be The Super Three! AND .... mission accomplished. I didn't buy one single item. Gosh I love my art space!

Sunday, October 9, 2016

diy oversized chair

Aunt Dottie enjoyed remaking furniture by reupholstering. I think given the chance, she would have been making her own too. Girls just didn't do that sort of thing in her day.

As I finished the basement, my thoughts turned to the upstairs furniture. We bought a sectional when we moved into our house 2 years ago from Art Van. We paid $2000 for it and it lasted about 3 years. We finally got rid of it after 5 years, but the frame was broke and the cushions were terrible!!

I looked around and couldn't find anything I thought was superior quality that didn't cost an arm and a leg. Quite frankly, this is expensive even to make but I'm up for the challenge.  

Soooo ..... it began.

The diy oversized chair.


I spent some time looking for plans online and I'm now convinced it's a well kept secret. No plans. I found some pictures of chair frames, and that was helpful. But .... I think my previous reupholstery attempts served me the best.


So here's the goal ... to reverse engineer this beautiful oversized chair I found online. The ad boasts kiln dried wood, reinforced corners and solid hardwood construction. The cost .... $1300. My mission is to reproduce this with the finest materials.


I spent some time looking for a way to generate my plans and finally discovered Sketchup by Google. Thank you Google!! Getting acquainted with Sketchup was a bit of a challenge but I finally managed to produce something worthy.


Burke and I sat out for our local big box store since our local lumber yard is now closed on Sundays. We debated between oak and poplar and finally went with poplar. 

Here's our shopping list: 
2pc - 1x6x8 Poplar
4pc - 1x4x8 Poplar
4pc - 1x3x6 Pine
2pc - 1x2x6 Pine
4 feet and plates for the legs.


We started cutting the 1x4's for the outer leg areas. We cut 4 at 36 inches and 4 at 24 inches. 


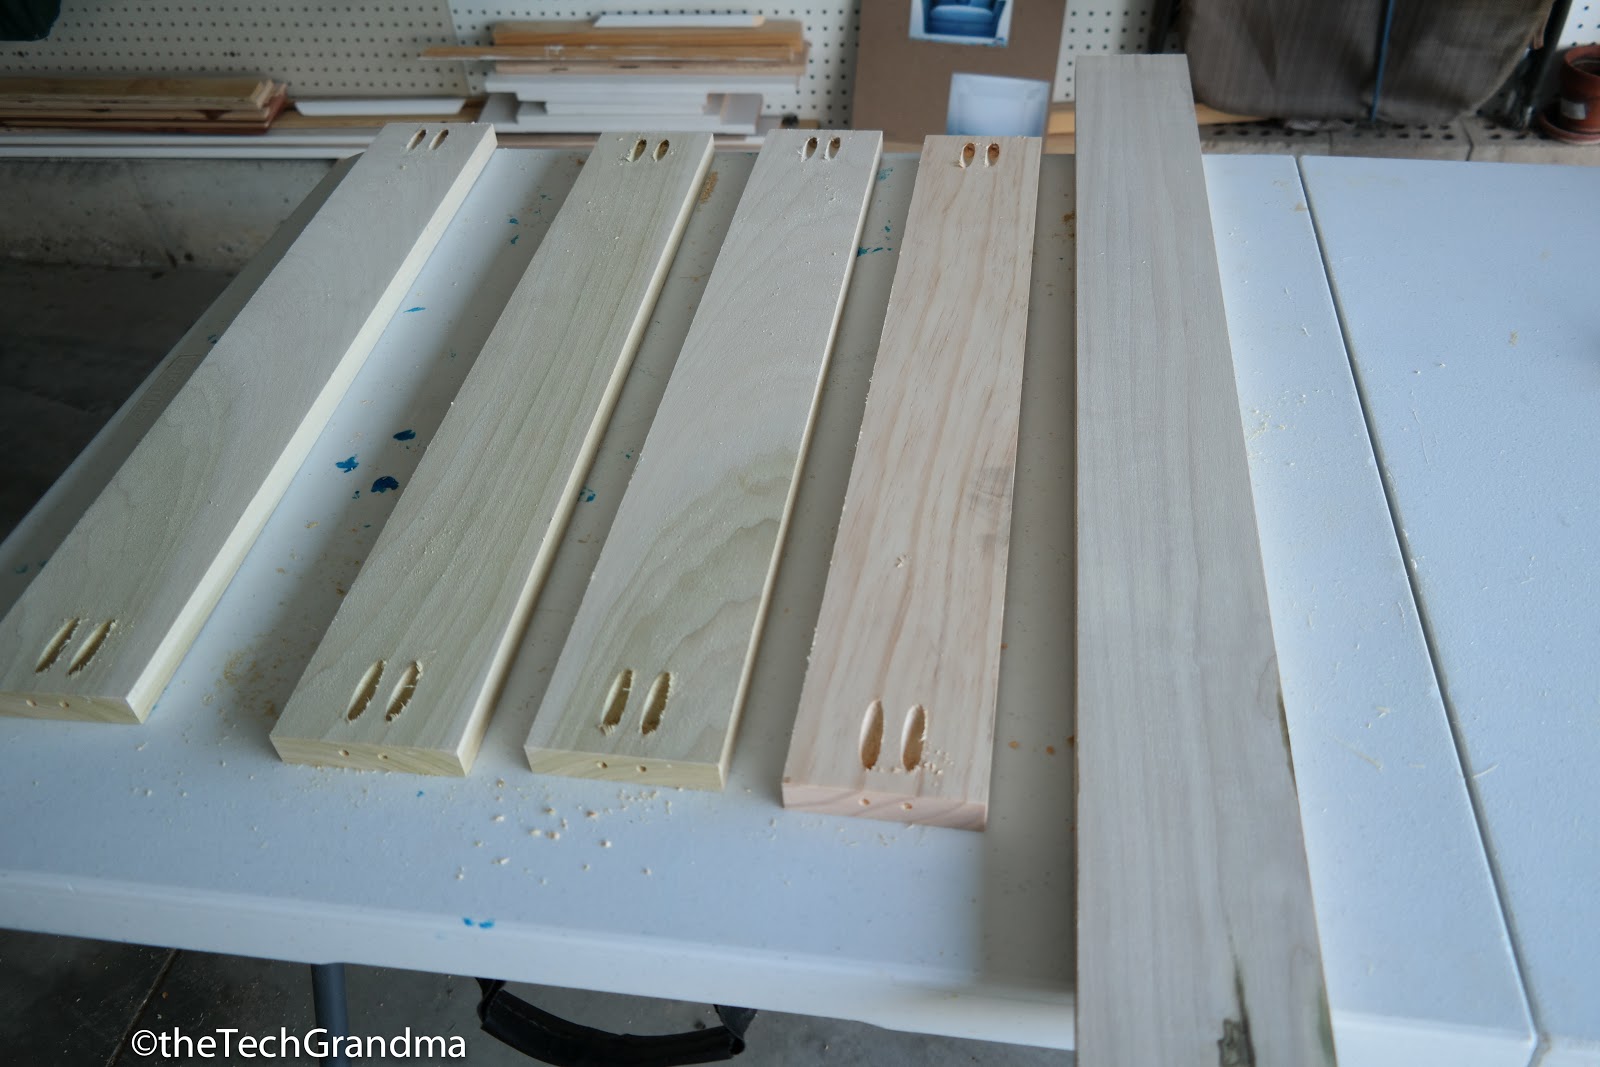
We added pocket hole screws on both sides of the 24 inch cuts.


Then we glued and screwed them together.


I used the 1x3 pieces of pine to reinforce the mid section and also provide support for upholstery. Then we used left over poplar and reinforced the corners for the inside areas of the chair. We used glue and 1 1/2 brad nails.


Next up was cutting the 1x6's. These were used for the kick boards and back support. 


These were cut at 44 inches. I put pocket holes on the end and then we joined them together with pocket holes. Use lots of glue.


We finally killed off our glue bottle after 3 wood projects. Felt so accomplished, we used every last drop. Gonna miss that bottle, good thing I've got a new one waiting in the wings.


I reinforced the outer corners with the pine 1x2's for reupholstery efforts. The wood was joined with glue and 1 1/2 brad nails. Then again in the center to tie it together, about an inch from the ends to get fabric and foam tucked away inside.


We added the legs.


The finished product. It took us just a couple of hours to build since the plan was completed. Super solid. There's no way this thing will break anytime soon. 

So next I'll buy the springs, foam, and fabric. All of which has been ordered. Keep in mind throughout the project that my mission includes using the finest materials. I want this to last a lifetime ... or two. Anything you buy these days, will last maybe 3-5 years if your lucky.

We'll go through each area as the project progresses - but I can tell you the most expensive part of this project will be the cushions. Stuff has been ordered ... impatiently awaiting.

Total cost so far .... $120.00

Monday, September 26, 2016

Sewing Desks

On the basement project list is to make a U shape craft desk. Last weekend, Burke and I got 2/3 of the project completed and I love it! I found the plans from Ana White's website. In this particular project, she teamed up with Jillian from I am a homemaker.com. I really benefited from Jillian's great description of her build for the cabinets. I modified the plans a bit. :)


In total, I have 5 machines and I wanted a work bench big enough for all 5. Can you believe it? Who has 5 machines? This gal! AND ... they are ALL Brother machines, except for the cute little 1972 Kenmore (green one) I found for $20 at Salvation Army.


I really liked this desk design, but if I had to do it over again - I would design it with corner cabinets and not in rectangle modules. I am a beginner at this though so live and learn.


Burke and I started our journey with a trip to Fingerle Lumber in Ann Arbor.


Then we cut all the lumber according to the cut list.


I wanted 2 cabinets, one for each desk.


First mistake, when the guy says, "Is it okay that it's not exactly a 2 x 2? Say no. You can see the top trim piece - you can see how it's wider than the legs.


I bought spindle legs at Lowes for the opposite end of the desk for about $15/each.


Mistake number 2. Never use caulk to seal wood products, especially when you bought some lovely birch. *Sigh*


Check and double check squareness. These were my very first drawers and I had a heck of time - but they turned out pretty dang square.


Mistake #3 ...wait, no - related still to mistake #1. Because of the shorter 2 x 2, I had to double up the back otherwise my drawers came out past the back.


And so, I painted. It took me a whole weekend to get the painting done. I put several coats of paint on everything.


Burke and I used 1x4's to join it all together using my fabulous pocket jig. I didn't take a picture of it, but we reinforced the corners with cross pieces.


Now, for the countertop. Burke's sister Aileen gave us 4 boxes of cedar when we first moved into our house. I finally got to use them!


We took three 1x8's and joined them together by pocket screws and glue. The we took the thin layers of cedar and nailed them on top.


Using left over fake 2x2's, I reinforced the counter and will use them to join them to the outer edge of the desk. We cut those 2x2's to fit exactly inside the desk and they fit like a glove.


It was super solid. Burke sat on it and it didn't budge. Plus, we can disassemble it easily and move it if we had to.


And viola!


My basement smells amazing because of the wonderful cedar. I sanded them lightly and the top is super smooth.


The corner is reinforced for my monster embroidery machine.


I really love the nice wide area to move my chair between machines and the space for all 5 machines.


Not gonna lie ..... the drawers were a bear. Putting the slides in took nearly a weekend on their own. Lots of adjustments and sanding down to make them fit. The top ones work great - the bottom ones are stiff.  They work - but it takes effort.


The whole project took 3 weekends total and the cost was around $250.  I love that all my machines have their place and can be used quite easily. Mistakes were made, but they are my mistakes and were made with love. I really couldn't be happier.

Now on to the cutting table!