Showing posts with label #embroideredpatch. Show all posts

Monday, October 31, 2016

embroidery patch - part 2 - sewing

So now that the design is completed, time to make them a reality. If you missed how to design them, you can find it here in the Part I write up.


Once I figured out the magic recipe, these are pretty fun to make!


Start with a tear away stabilizer. I have tried both water soluble and regular tear away and I find them to be roughly the same. The regular tear away stuff is a tad bit more robust for this project.


I brought in my brother pes project into my PR-600II. Here's a shot of where I changed the thread color. I needed to select the "hand" to tell the machine to stop after each layer.


Put the hoop in and hit start. The first pass will do the bubble outline and it's really only to see where to put your fabric. What I have here is some craft stabilizer that I use for purses and things I want to be sturdy and the chosen color fabric.


I lay both the stabilizer and fabric together down over my first layer and make sure the fabric covers the design and let the machine stitch the next layer.


Take the hoop out and cut it next to the stitching line, very closely. I have the best scissors for doing that. 


Once I put the hoop back in - I let the machine do the rest. I did 2 on the same hoop. Don't make the same mistake I did once and put it in backwards. (sad trombone) Make sure you put the hoop back the same way.


Next I grab some heat n bond - the ULTRAHOLD stuff. The regular will work too, but in this case, I want to make sure there's a nice strong hold.


Make sure you turn the patch over and draw an outline, otherwise it won't fit properly. Take your scissors and cut out the outline just a smidgen smaller than the drawing. Then iron it onto the patch and it's ready to go!


Pull the stabilizer away and I usually dip my finger in water and run it across the edges to remove the white lint left from the stabilizer. You can even run some fray check around the edges if you like. Since I didn't cut the edges, I'd prefer not to. Fray check leaves the thread very stiff.

I hope Scream will like her new iron on patches!

Friday, October 28, 2016

embroidery patch - part 1 - design

Sometimes I write these blog posts just for me. Case in point .... my daughter Jackie plays on a roller derby team and when some of her team mates asked about embroidery patches - she happily informed them, "my Mom can make those!" So I finalized a process for creating embroidery patches. After a few weeks the orders started coming in, I began making them. I messed it up three times before I fully remembered what I had done before. So ....this is me, documenting my steps for any future embroidery patch sales.


First, I started with Gimp. Gimp is a great open source tool for manipulating images. I create a new image about 400 x 140, which equates to about 2 inches in width and picked a nice modern font. Using the text tool, choose your font and type out your word and scale it so it takes up most of the available image space.


In the Layers toolkit, right click on the layer and choose Alpha to Selection. This causes the words to be selected.


Then choose to add a new layer. We will want the bubble outline to be a separate layer - you'll see why later in the project.


Accept the default and choose OK.


To get the bubble outline, you want to grow the selection.


You can play with various setting, but I usually do about 1/4 inch larger.


Looks like this when it works correctly. If you don't see the growth selection, try a smaller grow.


Then go to Edit, and choose Stroke Selection.


Choose a nice solid width. The width you choose will be out applique width, so choose at least an 8.


This is what it looks like.


Now, we need to export this image into 2 different files. One with the text and one with the bubble outline around the text. You can do this with hiding layers. Hide the bubble and then export. This gives you just the text.  Choose File, Export As - then choose a file name. Choose the *.jpg format because Amazing Designs accepts .jpg's.

Then go back and do it again. Hide the text this time and make the bubble layer visible. Export As, and choose a different name.


At this point, you will have 2 files.


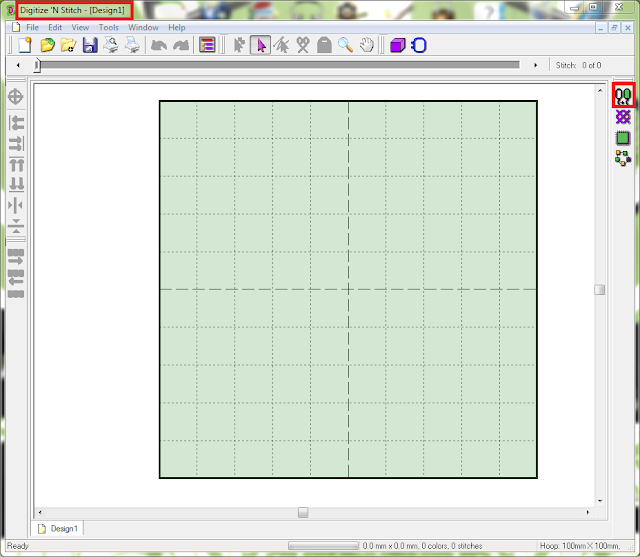
Open Digitize N Stitch. I bought this software several years ago for $200. It's been great so far. It's not super complex and does have it limitations but it gets the work done. I've managed to not spend thousands in something else and since I don't make my millions with embroidery .... I'm good.  You can visit their website here.

So open it up and select the digitize option (shown in the pic above).


Choose the text file first and choose Next.


Adjust it if necessary.


You really should have 2 colors, the background and text colors. If you end up with three like shown above, choose Edit image.


Take your paint bucket and fill the extra color so it's all one color.


Save it, and then you should see only 2 colors. If there's still 3 - go back and look for the extra color.


Choose Next.


Choose Create Applique. This will allow us to have the border act as an applique and will apply necessary layers that your machine needs.


Now, it's time to bring in the bubble. Choose Next.


Choose the picture option and select the bubble filename.


Choose the magic wand and click in the bubble area. This will cause the area to become digitized.


Select a bigger hoop if you need one. 


And there you have it. A cool, ready to go digitized patch. In part 2, we'll put it in our embroidery machine and finish it up.