Thursday, January 5, 2017

heat transfer vinyl

I asked for and got a heat transfer press for Christmas, which was an awesome gift from Burke. I had to think real hard about what design I wanted my first shirt to be. I unboxed my new 5 in 1 Zeny Heat Press and got to work. See it here on Amazon.


Burke and I had just finished our first IoT (Internet of Things) project and I was really geeked about that, so my first shirt was all about the Alexa and the Garage Door project.


Once I finally made up my mind what the design should be, I went to Brother's Scan N Cut Canvas. 


Then I created my design.


I cut the vinyl using my Brother Scan N Cut. Any vinyl cutter will work just fine, Cricket or Silhouette. I did test the cut on vinyl, but it ended up not being perfect. You can see my little circle test cut in the picture.


My knife settings were incorrect because I ended up cutting the vinyl and the carrier sheet. I looked everywhere to see how big a deal that was. Should I recut the vinyl? I didn't want to waste what I had done and I really couldn't find any information - so I went for it. I figured my first one would be a throw away anyway.


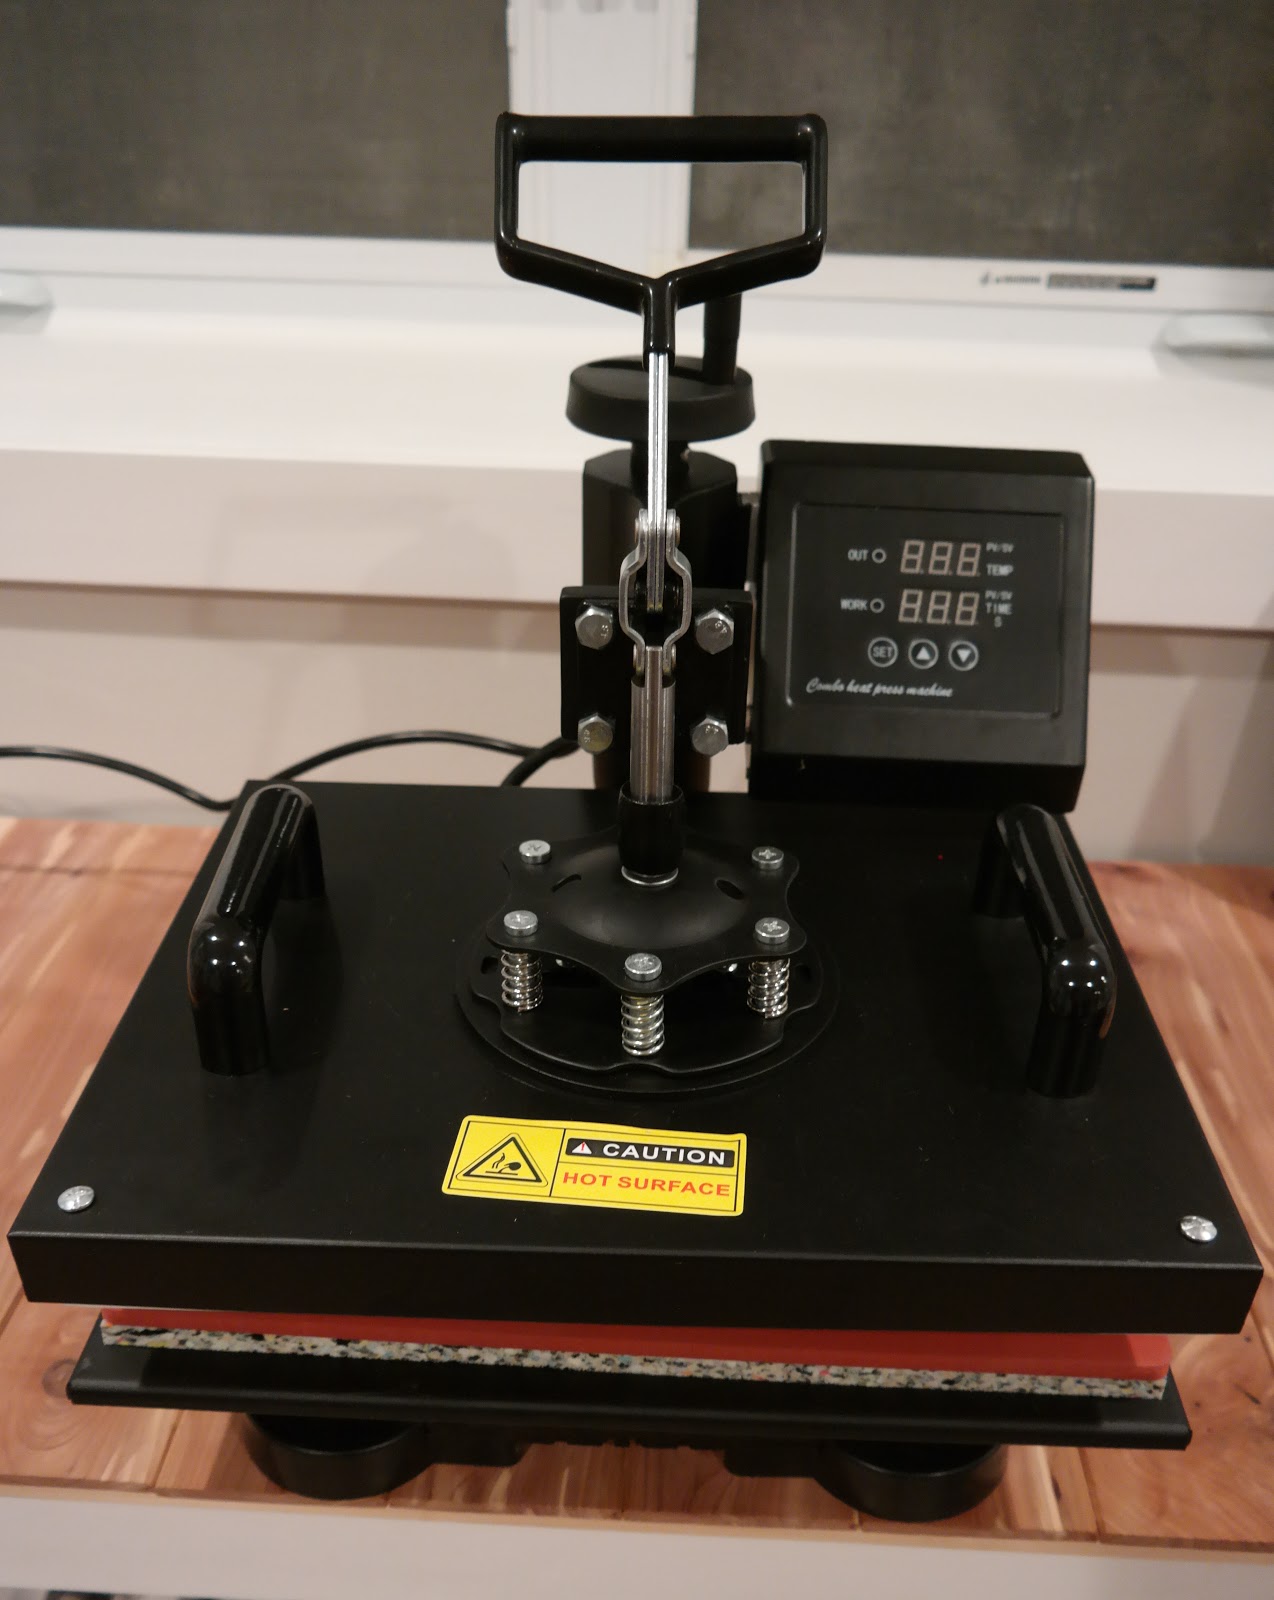
I heated up my press to 305 degrees fahrenheit and set my timer for 12 seconds. I positioned my design (shiny side up or carrier sheet side up) on my shirt.


I pressed the vinyl for 12 seconds and let it cool down for a minute or two. Then I took my tweezers and peeled off the carrier sheet from each piece. It worked! And .... I didn't have to throw away my first shirt or waste any vinyl!

So far, I really like my new heat press and my cool shirt ..... I'm wearing it to the kick off meeting for First Robotics this weekend. 

Nerds unite!

Monday, January 2, 2017

duct tape dress form

I don't always share on everything I make and I thought really hard about not sharing this cause it doesn't really shed me in a flattering light. Although .... I am a grandma and not 20 anymore, there are a few pounds I'm not proud of. I'm biting the bullet and just doing it. Stupid slow metabolism.


I saw a few posts online about making a duct tape dress form and I really liked the idea. Anyone who has made their own clothes can tell you it's super difficult to alter stuff for yourself.  Making a duct tape double was quite appealing.


So on New Years Eve, I enlisted Burke to help. This task called for "Extreme Man" at his finest and I definitely needed attention to detail here. He said he would help but I had to wear the duct tape over my mouth. Ha.Ha.


So we started with this. I didn't take a picture of the rolls afterwards, but I can tell you we used all the decorative duct tape and about half the silver. Actually, I should have bottom 3 rolls of the decorative stuff. When we ran out, there were a few spots on the back that needed covering.


I started with a nice snug shirt, which has only recently gotten snug on me. Stupid metabolism. Fat girl in a little shirt (sways arms and sings Tommy Boy melody)...


Starting with the silver duct tape, Burke started at the bottom and outlined the chest area.


And then moved upwards.


Admittedly the chest area was the hardest to do. The trick is making a lot of little relief cuts to get the edges to lay down.


Here's a picture of the back. (embarrassing moan)


Once it was done - we added another layer of the decorative duct tape. In hindsight, I really wish I had bought a different style of duct tape. This style made it look a little like a weird meat suit. It was a form fitting and definitely uncomfortable. The whole thing took about 2 hours and I was so ready to be done.

Once we were done, I marked out my vanishing waistline (or where I thought it was) and then Burke cut it right down the middle in the back to remove it - shirt and all.


I took my existing dress form which I love because it's adjustable.


Then put the new meat suit, I mean .... duct tape dress form and put it right over top of it.


I brought out an older pattern I had and some fabric I bought like 5 years ago. I had made it once already so I knew it was needed more precise altering. I was so amazed at how nice it was having a double me. I was gonna say mini me - both we all know that's a lie.


The arms were a bit weird, but they still worked. Hopefully in a couple of months we'll be making a new one ...... cause damn.

If you're someone who enjoys altering for making their own clothes - I would really recommend making your own duct tape dress form.


Sunday, January 1, 2017

alexa and the garage door

Quite some time ago, I had the goal of hooking Alexa up to my garage door without buying an off the shelf IoT product. The purpose was really to understand connecting Alexa and IoT better. So here .... the the result of my quest so far. 


So I started down the path of using a microcontroller and I documented that here. In a nutshell, the main obstacle was security and wifi. So the Netduino I got didn't have wifi and I wasn't looking to wire up ethernet from the garage, nor was it capable of doing security in the standard HTTPS fashion. So I started looking at other microcontrollers. 


Then I fell in love .... with the ESP8266. Unbelievable! Quite possibly the coolest gadget ever. You can read more about the microcontroller here - but basically it has a 32bit RISC CPU and the capabilities for 2.4Ghz wifi.

Pictured here is a HiLetgo New Version NodeMCU LUA WiFi Internet ESP8266 Development board. It cost $9.00. Seriously! $9.00. It's breadboard friendly, has a usb to serial converter and a usb micro controller. I also bought like a 4 pack of the ESP8266 chip itself for about $4.00/piece for future projects.


I flashed the board using this instruction. Pretty straight forward - had no issues, it worked like a charm. 

Then ... using the Arduino IDE, I followed this information to add the ESP8266 as an addon. Again, worked great .... had no issues. Now I can program the ESP8266 using the Arduino IDE. In the Boards Manager, I choose the NodeMCU 1.0. I played around with the Example sketches for the ESP8266 and TA-DA. I had it connecting to my wifi.

O.M.G.

OK, so at this point, I got my ESP8266 Dev board connecting to our wifi.

Next challenge ....how to connect securely to my endpoint?


So the next step was to investigate how to connect to a Amazon endpoint. I've been looking at AWS Iot for some time and quite frankly I was really confused by it. I played with it and deleted stuff and played again.

Eventually I stumbled on MQTT, which is a really lightweight connectivity protocol perfect for IoT. Super lightweight and not as blotted as HTTP. THEN .... I ran into this. Genius!

Seriously, I almost cried. Thank you Fábio Toledo!

Fábio explains it the best by saying, "We cannot use AWS MQTT service directly because of the lack of support for TLS 1.2, we need to use the websocket communication as a transport layer for MQTT through SSL (supported by esp8266)

This way we can change the state of your esp8266 devices in realtime, without using the AWS Restful API and busy-waiting inefficient approach."

It took a little while to work out the kinks, but finally I got it to connect, subscribe, and send messages. I was soooo geeked!


Next, was to set up the Lambda event using AWS, and this article really helped me. So this really tied everything together for me and just really took the confusion out of AWS IoT. I've done Alexa Skills before - so it wasn't long before I was communicating using Alexa, the ESP8266, AWS IoT, and AWS Lambda. I did have some security issues, but once I figured those out ... I was golden.

Last challenge, I really needed help with this .... How to hook up the ESP8266 to the garage door opener remote I purchased?

Heavy sigh .....

Luckily I have an awesome husband who understands electronics a little bit more than me. Together we headed off to Radio Shack and bought this Reed Relay. It was a guess really, what type of relay we actually needed.


I really wanted to use the garage door opener remote because I didn't want to mess with the electronics of the garage door - so if I accidentally fried something - it would be just the remote.

So on New Years Eve, after a dinner and movie - Burke and I sat down and finished off the wiring. This part was all him.


We got power to the breadboard using the ESP8266, and then hooked up the relay. Once we got power to the relay, we hooked up the LED.  I wrote a small program that basically would use turn on the LED. Once I could run the program and light up the LED, we hooked up the button and .....

a few minutes past midnight on New Years eve - 2017, it worked.

This morning, I finished putting it all together ....


Quite possibly the best week off work and New Years a girl could ask for.

I.love.my.life.